
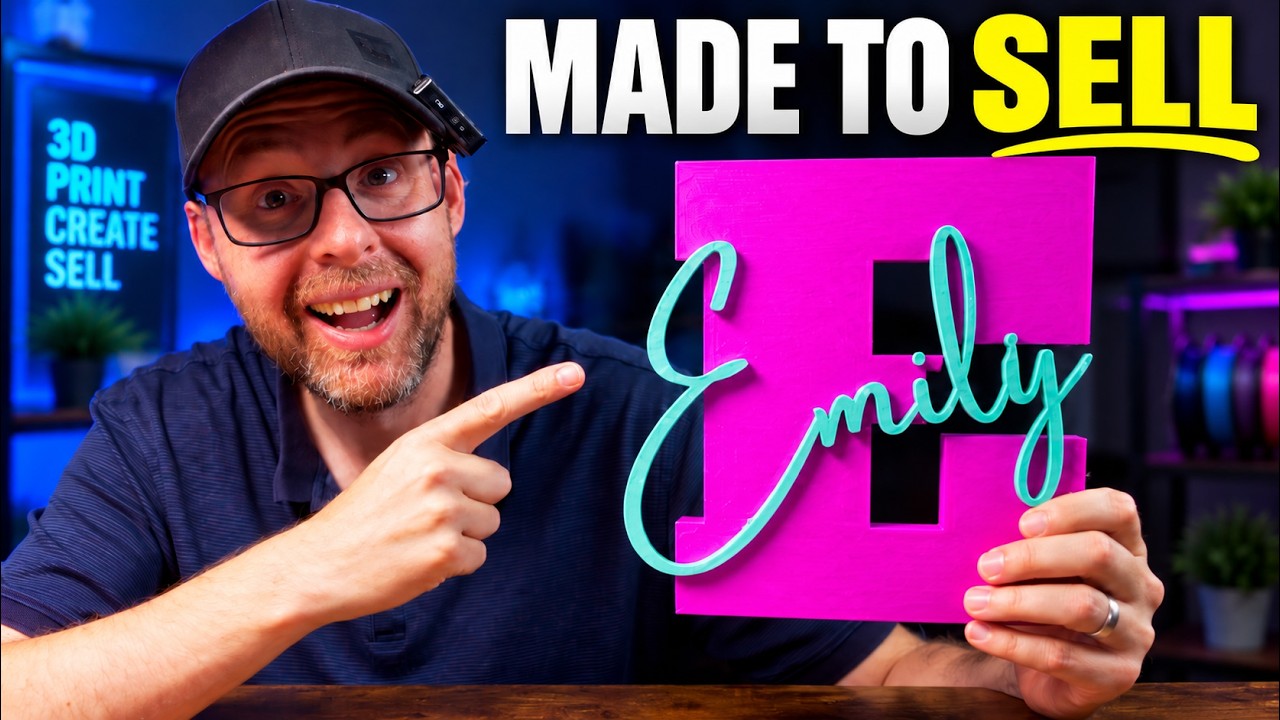
Custom 3D printed name signs are a practical way to turn a simple design into a personalized gift or a product to sell. For this project, I made a large initial with a contrasting name fitted into a recessed area on the front.
I sold one of these signs for $35, with a making cost of about $2–$3. Your costs will depend on the size, filament, print time, and how you sell it.
Here is how I build the design in Canva, create the printable parts in Tinkercad, and assemble the finished sign.
This article contains affiliate links. I may earn a commission if you purchase through these links. As an Amazon Associate, I earn from qualifying purchases.
What You Need to Make a 3D Printed Name Sign
- Canva or another design editor that can create SVG artwork
- Tinkercad or another 3D modeling program
- A 3D printer and slicer
- Filament in the colors you want for the initial and name
- A small amount of glue suitable for your printed material
- Optional: a specialty build plate for a decorative finish
I used SUNLU filament for this sign. You can find the colors and materials through my SUNLU filament link. Use the code FixThisPrintThat for a discount on the SUNLU site, and confirm the offer at checkout.
Because the name and initial are printed as separate parts, you can make a two-color sign by printing each part in its own color and assembling them afterward.
Step 1: Create the Large Initial in Canva
Start a new design in Canva. I used a landscape canvas, but the exact canvas dimensions are less important than the artwork because the final size is set in the modeling program.
Add a text heading and type the large initial. In my example, I used the letter E. Choose the font you want for the main body of the sign and enlarge the letter so it is easy to work with.
Export the initial as an SVG with a transparent background. If direct SVG export is unavailable in your setup, export a PNG and convert it to an SVG. Check the converted outline before importing it so the background does not become part of the model.
Step 2: Design the Name as a Separate File
Create another text heading and type the name. Pick a font that will look good across the large initial. A connected cursive style can work well, but the important part is how the letters connect and where the small details will sit.
Pay special attention to detached pieces, including the dots above lowercase i letters. Those little parts need somewhere to attach on the main initial. In my example, I repositioned the name so both dots were supported by the E.
Export the name as a separate transparent SVG. Keeping the initial and name separate lets you adjust their positions and create the recessed pocket in the next steps.
Step 3: Import and Arrange the Artwork in Tinkercad
Create a new 3D design and import both SVG files. You should have the large initial and the name as separate shapes.
Move, rotate, and resize the name until it fits across the initial. I angled the name slightly and adjusted its size to get the layout I wanted.
Check the entire name, including detached dots and other small pieces. Make sure the layout gives those pieces a place to attach. A design can look good from above while leaving a small detail hanging beyond the main letter.
Step 4: Set the Sign Size and Thickness
Scale the layout to fit your printer and the intended display location. I scaled mine to roughly 200 mm. Choose dimensions that fit your printer and where you plan to display the sign.
I made the main initial about 15 mm thick. For a deeper sign intended to sit on a desk, you can try a thickness around 30–40 mm. Whether it stands securely also depends on the letter shape and its base, so test the finished design.
For a thinner sign intended to lean against something or go on a door or wall, less depth may suit the project. Keep enough material behind the recessed name so the pocket does not cut through the main letter.
Step 5: Make a Recess for the Name
The recessed area is what gives the name a clear position during assembly.
- Duplicate the name using copy and paste.
- Move one copy aside and keep it as the separate name you will print.
- Leave the other copy aligned with the initial.
- Change that aligned copy into a hole in Tinkercad.
- Position the hole so it cuts into the front of the initial while leaving a solid back.
- Select the initial and the hole, then group them to create the recess.
You now have two printable parts: the main initial with a name-shaped recess and the separate solid name. Export each part for your slicer.
If your printed name is too tight, adjust the fit in your model before producing more signs. Avoid forcing delicate letters into the pocket.
Step 6: Orient the Parts for the Finish You Want
I printed the separate name with its visible face against a specialty build plate. Rotating the part 180 degrees lets that face pick up the plate’s finish. In my finished example, this gave the lettering a decorative, sparkly appearance.
Rotate the model so its front face sits on the plate; check the orientation in the slicer before printing.
For the main E, I kept the recessed front facing upward. This left the back on the build plate and the name pocket open at the top. You can use ironing on the visible top surface for a smoother finish.
Step 7: Print and Assemble the Name Sign
Print the initial and name in your chosen colors. Once the pieces are ready, test how the name sits in the recess before adding glue.
My finished name slid into place, and I used a small amount of glue to hold it securely. I paid particular attention to the two small dots above the i letters because they were the pieces most likely to come loose.
Use only as much glue as needed to secure the parts, and follow the adhesive’s directions before handling or packaging the sign.
A digital caliper is an optional tool for checking printed dimensions while troubleshooting a fit. If you are building out your workspace, the 3D print toolbox is another resource to browse. Neither is required to create the design.
Making Custom Name Signs to Sell
The appeal of this project is personalization: you can change the initial, name, font, size, and colors while using the same basic workflow.
My $35 sale and roughly $2–$3 making cost show why this project interested me. When pricing your own signs, account for more than filament: include your design and assembly time, electricity, glue, failed prints, packaging, selling fees, and any shipping costs you cover.
Before taking repeat orders, make one complete sample and check the finish, fit, and small details. Use that sample to estimate your actual production time and material use.
If you want another customizable project, see my guide to making custom 3D printed clickers from a PNG.
Frequently Asked Questions
Do I need a multicolor printer?
This workflow uses separate printed parts. You can print the initial in one color and the name in another, then glue them together.
How do I handle the dots above i letters?
Arrange the name so the dots sit over the large initial and have a place to attach. I used a little glue around those small pieces during assembly.
Can I make the sign thicker?
Yes. Increase the depth of the main initial and adjust the recess and name placement to suit it. My initial was about 15 mm thick; a deeper version can suit desk display.
Why print the name face down?
It lets the visible face take on the finish of the build plate. I used a specialty plate to give the lettering its decorative finish.
Start with one name sign, get the layout and fit right, and then use that design as the starting point for your next personalized version. For more projects, subscribe to Fix This. Print That.