
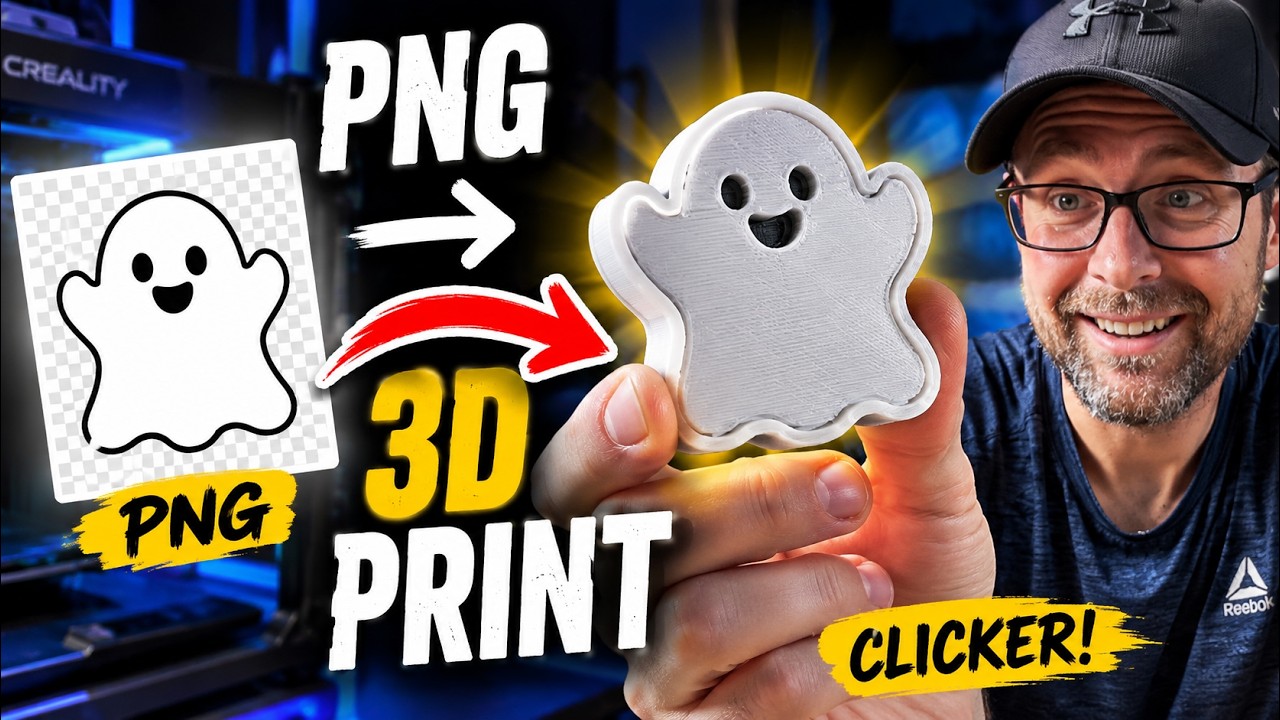
What if you could take a simple PNG image, turn it into a custom 3D printed fidget clicker, and have the finished print ready in less than an hour?
That’s basically what I did with this little ghost clicker.
The entire print took me around 45 minutes, used only a small amount of filament, and required no supports or complicated print settings.
The best part is that you don’t really need to know how to 3D model anything.
I started with a PNG image, uploaded it into the MakerWorld MakerLab Clicker Generator, downloaded the 3MF file, sliced it, and printed it.
That’s pretty much it.
In this tutorial, I’ll walk through the entire process, including how to create the clicker, customize it, print it, prepare the mechanical keyboard switch, and assemble everything together.
What Is a 3D Printed Fidget Clicker?
A 3D printed clicker is basically a small fidget toy built around a mechanical keyboard switch.
Press the top and you get that satisfying mechanical keyboard click.
Instead of being limited to a normal keyboard keycap, though, you can turn almost any design into the top of the clicker.
That means you could make things like:
- Ghosts
- Animals
- Sports designs
- Names
- Initials
- Logos
- Holiday designs
- Characters
- Custom shapes
- Keychains
Once you know how the process works, it’s really easy to start making completely different versions.
For this tutorial, I made a simple black-and-white ghost clicker.
What You Need to Make a Custom 3D Printed Clicker
You don’t need much for this project.
You’ll need:
- A PNG image with the background removed
- Access to the MakerWorld MakerLab Clicker Generator
- A 3D printer
- Filament
- A compatible mechanical keyboard switch
- Small flush cutters or snips
That’s really about it.
If you’re doing a multicolor design like mine, you’ll obviously also need the different filament colors you want to use.
My ghost only uses black and white, so it’s a pretty easy multicolor print.
Step 1: Start With a PNG With No Background
The first thing you need is your image.
I used a cute ghost graphic that already had a transparent background.
This part is important because you don’t want a big rectangular background becoming part of your model.
Ideally, you want the PNG to contain only the actual object you want to turn into the clicker.
Once you have your image ready, head over to the MakerWorld MakerLab tools and open the Clicker Generator.
Step 2: Upload Your Image Into the Clicker Generator
Inside the generator, you can start with some of the built-in icons, but I wanted to make something completely custom.
I selected the image option and uploaded my ghost PNG.
Once the image loaded, the tool automatically started creating the clicker around it.
That’s what makes this process so easy.
You’re not designing the clicker body from scratch.
The generator handles that part for you.
You basically provide the artwork and then customize how you want the finished clicker to work.
Step 3: Choose How Many Clicker Switches You Want
The generator allows you to use different numbers of switches.
For a simple clicker like my ghost, I only needed one mechanical switch.
You can also adjust where that switch sits inside the design.
For mine, I wanted it right in the center.
If you’re creating a longer or oddly shaped design, being able to reposition the switch can be really useful.
The goal is to put the clicker somewhere that feels natural when you press it.
Step 4: Set Up Your Colors
My design only uses two colors:
White for the main ghost and black for the face.
So I set the generator to use two colors.
Choosing your colors here can make things easier once you bring the model into your slicer.
If you’re creating something more detailed, you can build designs with additional colors depending on your printer and multicolor system.
But you definitely don’t need a complicated five-color design to make something that looks good.
Sometimes simple works better.
Quick tip: Make sure your filament is dry before printing to get the best results. Check out our filament dehumidifer by SUNLU review
You Can Also Turn the Clicker Into a Keychain
One feature I really like is the ability to add a keychain loop.
Instead of creating a normal standalone fidget clicker, the generator can automatically add a loop to the model.
Now you have something that could go on a backpack, keys, pencil case, or bag.
I didn’t use the keychain option for this particular ghost, but I can definitely see myself experimenting with it.
Especially if you’re making personalized versions.
Step 5: Adjust the Thickness and Image Depth
Under the additional settings, you have quite a bit of control over the final model.
You can change things such as:
- Overall model thickness
- Top thickness
- Image depth
- Switch tolerance
For my first print, I didn’t go crazy changing everything.
The default settings were already pretty close to what I wanted.
One thing I don’t need is an extremely thick raised image.
I only need enough depth for a couple of layers to create the black details on top of the ghost.
That helps keep the model simple and keeps the print time down.
Adjusting Switch Tolerance
There is also a switch tolerance setting.
This controls how tightly the mechanical keyboard switch fits into the printed part.
I prefer a fairly tight fit because I don’t want the switch falling back out every time I use the clicker.
If your printer produces a fit that is too tight, you can increase the tolerance slightly.
If yours ends up a little loose, you can also use a small amount of glue during assembly.
I would recommend trying the normal tolerance first before making a bunch of changes.
Preview the Clicker Before Printing
The generator also gives you an assembled and exploded preview.
This lets you see how everything is going to fit together before you download the model.
You can even hide different parts and see where the mechanical switch sits inside the clicker.
I really like this because you don’t have to wait until after printing to understand how the pieces are supposed to go together.
Once everything looks right, you’re ready to download the 3MF file.
Step 6: Bring the 3MF Into Your Slicer
When I opened my clicker in the slicer, both the front and rear portions of the model came in together.
If you’re making a multicolor print, there’s a useful trick here.
You can right-click the model and split it into objects.
That allows you to separate the back from the front and move them onto different build plates.
Why would you want to do that?
Let’s say you’re making ten different clickers.
The front designs may all have different colors, but every single back might be black.
Instead of creating a bunch of unnecessary filament changes, you could put all of the single-color backs on one build plate and print the multicolor fronts separately.
That could save both printing time and filament waste.
How Long Does a 3D Printed Clicker Take?
These are surprisingly fast prints.
My main ghost piece took roughly 25 to 30 minutes and used around 6 grams of filament.
The second part was even faster because it was a simple single-color print.
Altogether, I was around 45 minutes of total printing time for the clicker.
That’s one of the reasons I like these so much.
You aren’t committing your printer to a giant eight-hour project.
You can make one fairly quickly, see how it turns out, change the design, and print another one.
No Supports Needed
Another big advantage is that my clicker printed without supports.
That means there’s almost no post-processing once the pieces come off the printer.
No digging support material out of tiny holes.
No fighting with support interfaces.
No spending 20 minutes cleaning up a print that only took 45 minutes to make.
The pieces come off the printer and you’re pretty much ready for assembly.
Step 7: Prepare the Mechanical Keyboard Switch
Once the print is finished, you’ll need the actual clicker mechanism.
These use the same basic style of mechanical switches used in keyboards.
There’s one small modification you’ll need to make before installing the switch.
The bottom of the printed clicker is flat, but mechanical keyboard switches normally have several little pieces sticking out of the bottom.
We need to remove those.
On the switches I used, there were:
- Two metal pins
- Two small plastic pieces
- A center plastic post
I used a small pair of flush cutters to remove them.
Be careful when cutting the metal pins because they can fly across the room when you snip them.
I also like trimming the center plastic post down so the bottom of the switch is as flat as possible.
When you’re finished, you should have a much flatter switch that can sit properly inside the printed base.
Step 8: Install the Switch
Now grab the bottom section of your printed clicker.
Push the mechanical switch directly into the opening.
Mine was a tight enough fit that it basically snapped into place.
That’s exactly what I wanted.
I don’t want to have to glue everything if I don’t need to.
If your switch is slightly loose, you can put a tiny amount of glue around the appropriate area to secure it.
Just be careful not to get glue into the moving portion of the switch.
Step 9: Attach the Printed Top
The mechanical switch has a small plus-shaped stem on top.
Your printed clicker top has a matching opening.
Line the two up and push the printed top onto the switch.
Again, mine fit tightly enough that I didn’t need glue.
And that’s it.
You now have a completely custom 3D printed mechanical fidget clicker.
Press it and you get that satisfying keyboard click.
Make Clickers From Text, SVG Files and More
PNG images aren’t your only option.
Depending on what you’re making, the generator also gives you several other ways to create a design.
You can use:
- PNG images
- SVG graphics
- Custom text
- Built-in icons
- Block-style designs
The text option opens up a lot of possibilities.
You could make someone’s name, initials, a short word, or even something that resembles a miniature custom keyboard.
Being able to add text without opening separate CAD software makes it much easier to personalize these.
Could You Sell 3D Printed Clickers?
This is one of the first things I thought about after printing these.
The actual amount of filament involved is tiny, the print time is short, and custom fidget toys can have a much higher perceived value than the raw material used to make them.
I’ve seen small custom clickers and similar fidget items offered in roughly the $5 to $10 range, depending on the design and level of customization.
That makes them interesting for things like:
- Craft fairs
- Personalized orders
- School colors
- Sports teams
- Holiday designs
- Birthday party favors
- Backpack accessories
- Custom names
However, there’s an important distinction between being able to print something and having permission to sell it.
Before selling physical prints, check the commercial-use terms for the specific generator, artwork, icons, fonts, or downloadable files you’re using.
If you’re creating your own original artwork, that also gives you much more control over what you’re selling.
Why These Are Such an Easy 3D Printing Project
What I like most about this project is how little work it takes to go from an idea to an actual finished object.
You don’t need to sit in CAD software building everything manually.
You don’t need supports.
You aren’t using much filament.
And you aren’t waiting all day for the printer.
The basic process is:
Create an image → upload it → customize the clicker → download the 3MF → slice → print → install the switch.
Once you’ve made one, you can start making completely different designs extremely quickly.
And that’s where this gets fun.
A ghost can turn into a pumpkin for Halloween, a snowman for Christmas, a soccer ball, someone’s name, a school mascot, or whatever else you can turn into a clean image.
My Final Thoughts
For a project that uses only a small amount of filament and less than an hour of printer time, these custom 3D printed clickers are surprisingly fun to make.
The MakerWorld clicker generator removes most of the difficult modeling work, which means the design itself becomes the fun part.
Start with a good PNG, customize the size and colors, print the two pieces, modify the mechanical keyboard switch, and snap everything together.
That’s really all there is to it.
My ghost came out great, but now that I’ve made one, I can already see a ton of different ways to use the same process.
And because the print is so fast, experimenting with a completely different design doesn’t mean wasting an entire day of printer time.
3D Printed Clicker FAQ
What is a 3D printed clicker?
A 3D printed clicker is a small fidget toy that uses a mechanical keyboard switch underneath a custom 3D printed top. Pressing the design activates the switch and creates the familiar mechanical keyboard click.
Do 3D printed clickers need supports?
The clicker I made using the MakerWorld generator printed without supports. Your exact settings may vary depending on how you customize the model.
What kind of switch do I need for a 3D printed clicker?
These clickers use mechanical keyboard-style switches. Make sure the switch you purchase matches the dimensions expected by the particular clicker design you’re printing.
Can I make a clicker from my own image?
Yes. I created mine by uploading a PNG with a transparent background. The generator turns the image into the printable top of the clicker.
Can I make a clicker keychain?
Yes. The generator includes an option to add a keychain loop to the model.
How long does a 3D printed clicker take to print?
My ghost clicker took around 45 minutes total, although your print time will depend on the size, layer height, printer, number of colors, and settings.
How much filament does a fidget clicker use?
My main piece used only around 6 grams of filament, making this a relatively inexpensive project to experiment with.
Can I sell 3D printed clickers?
Potentially, but always check the commercial license for the generator, artwork, fonts, icons, and any other files you’re using. A file being free to download does not automatically mean physical prints can be sold commercially.